Cajun Gumbo

Gumbo can be made so many different ways and books have been written about the different combinations. However, this is one of my favorite versions as it is smoky and dark. The flavor needs time to develop, so don’t try and rush it. The slower it cooks the better it will be.
 

A pot filled with a smoky, dark gumbo featuring chunks of sausage, chicken, and various vegetables, simmering on a stove.

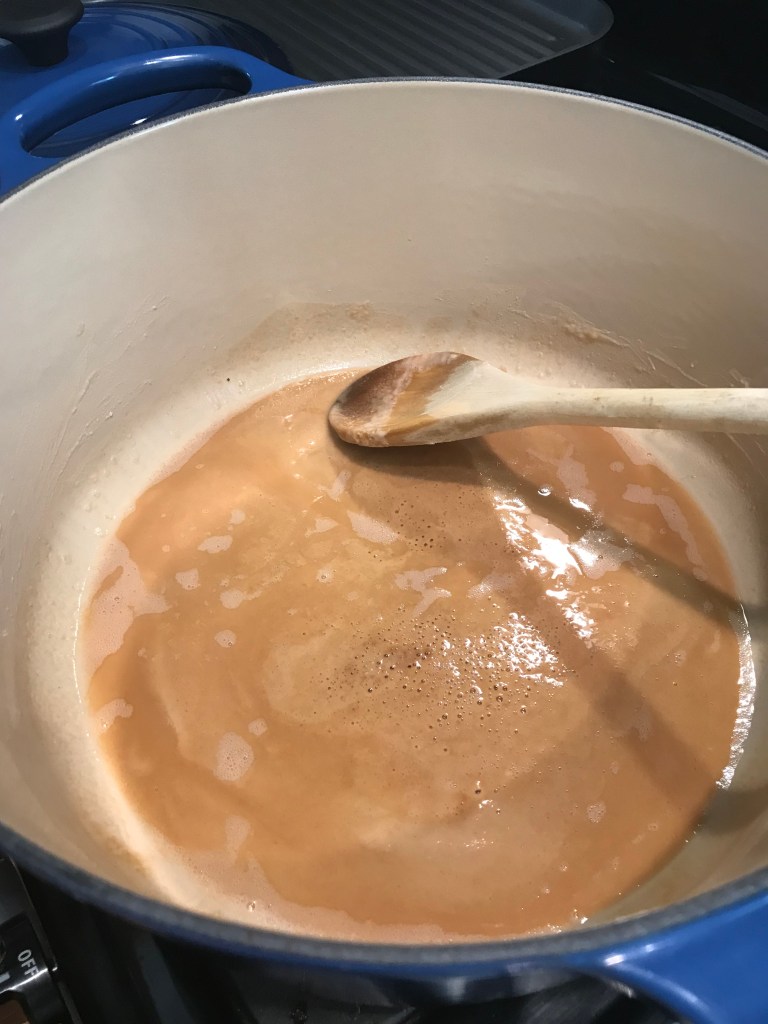
The key to a great gumbo is the roux. Making a good roux is easy, if you follow the steps exactly and again don’t rush. Check back to the previous post on making a roux.

Always serve with freshly steamed white rice. I like to medium grain, as it gets nice and sticky. It seems to hold up better with gumbos and jambalayas.

Ingredients: 

3/4 cup of Vegetable Oil

3/4 cup of All Purpose Flour

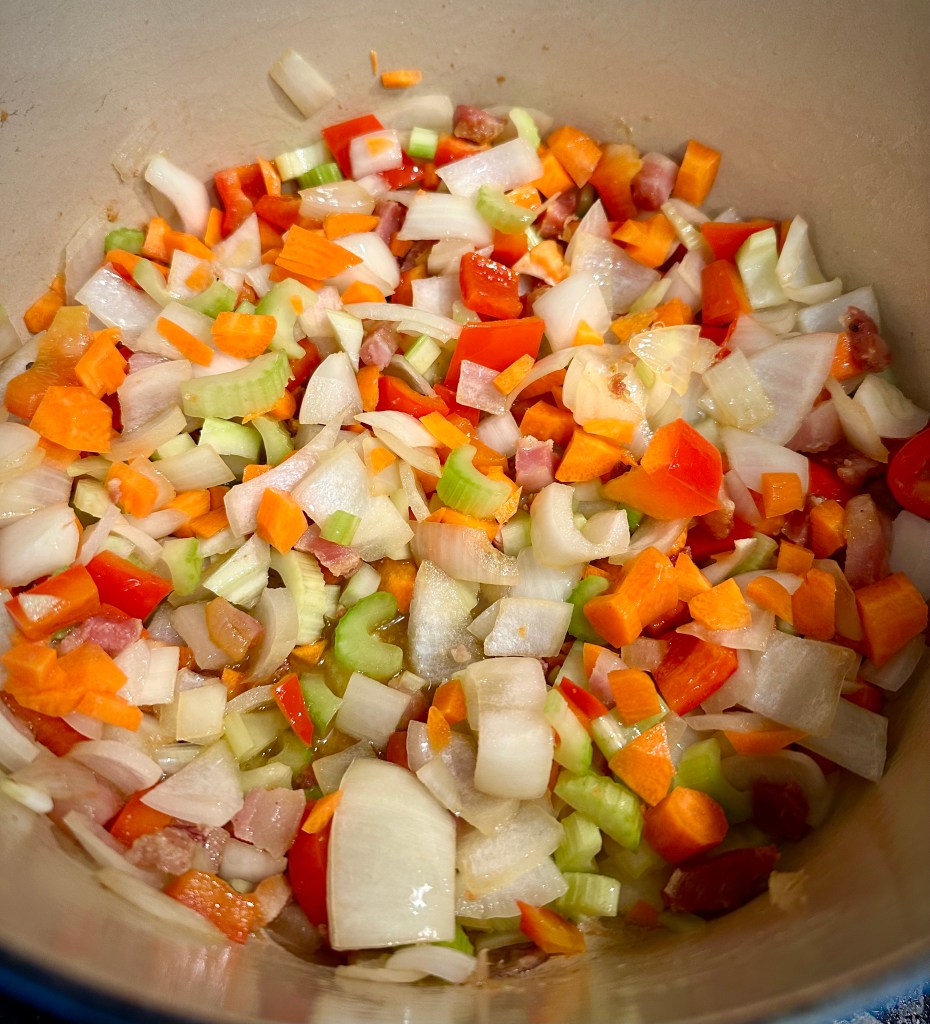
2 large Onions, chopped

1 large Green Pepper, chopped

1 cup of Celery, chopped with the leaves included

1 lb. of Andouille or other smoked sausage, sliced into 1/2 inch pieces.

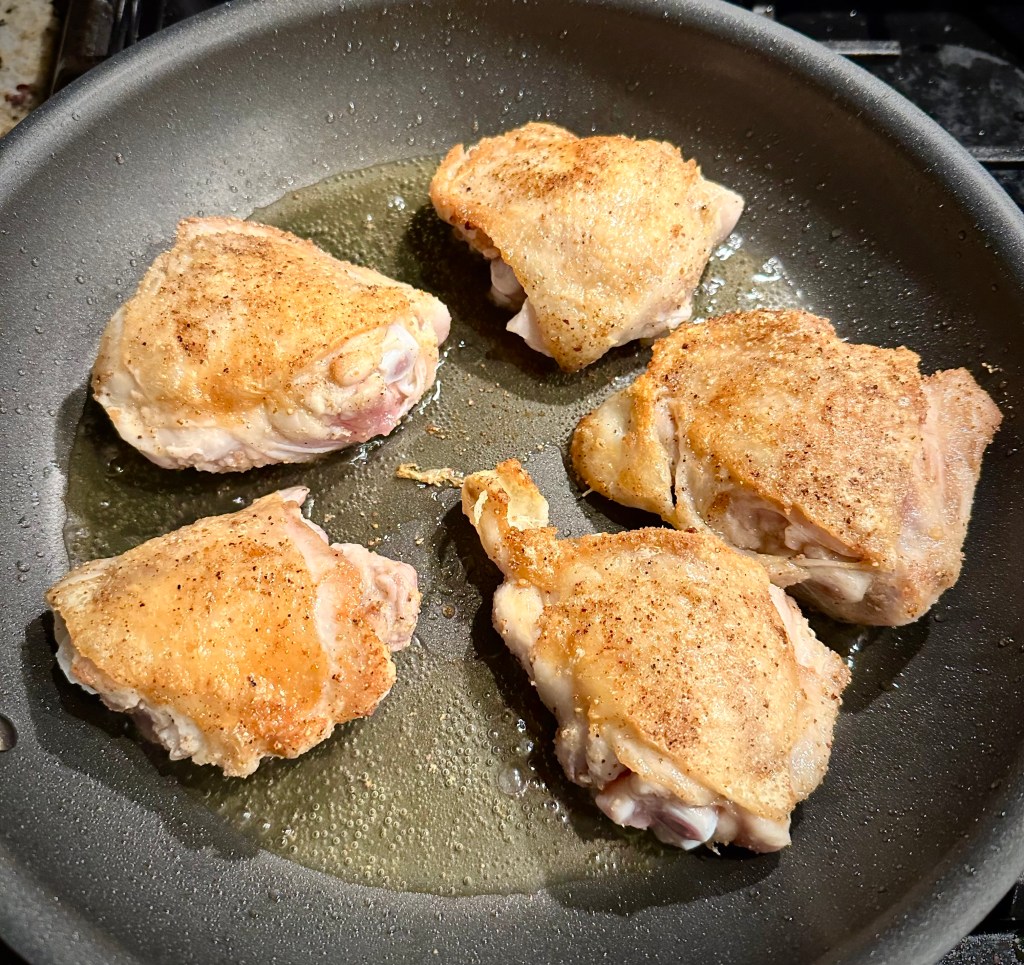
1 lb. Chicken, boneless skinless chicken thighs, cut into 2 inch cubes.

6 cups of hot Water or broth

1 Tbsp Salt, or to taste.

½ tsp. Cayenne pepper

3 Bay leaves

1 tsp. Thyme, or 3-4 sprigs of fresh Thyme

Lots of freshly ground Black Pepper

1 cup finely chopped Green Onions

1 Tbsp File Powder

Preparation:

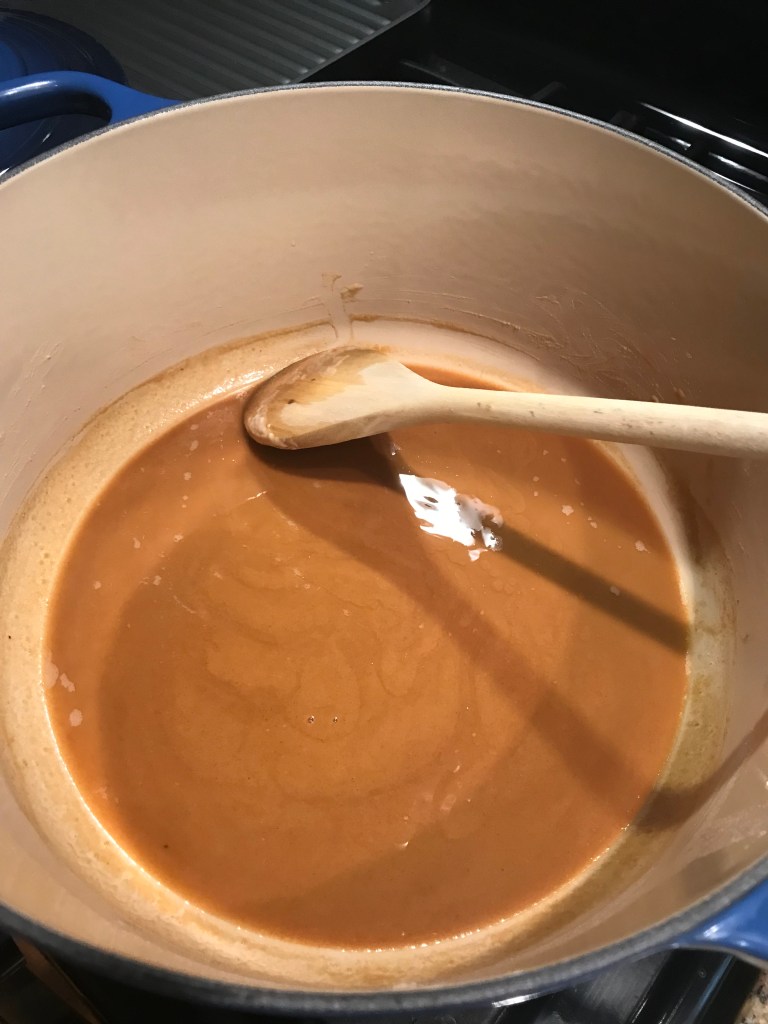
Make a medium or dark roux, then add all the vegetables and spices and cook for 5 to 7 minutes. When the smell starts to fill the kitchen it’s ready.

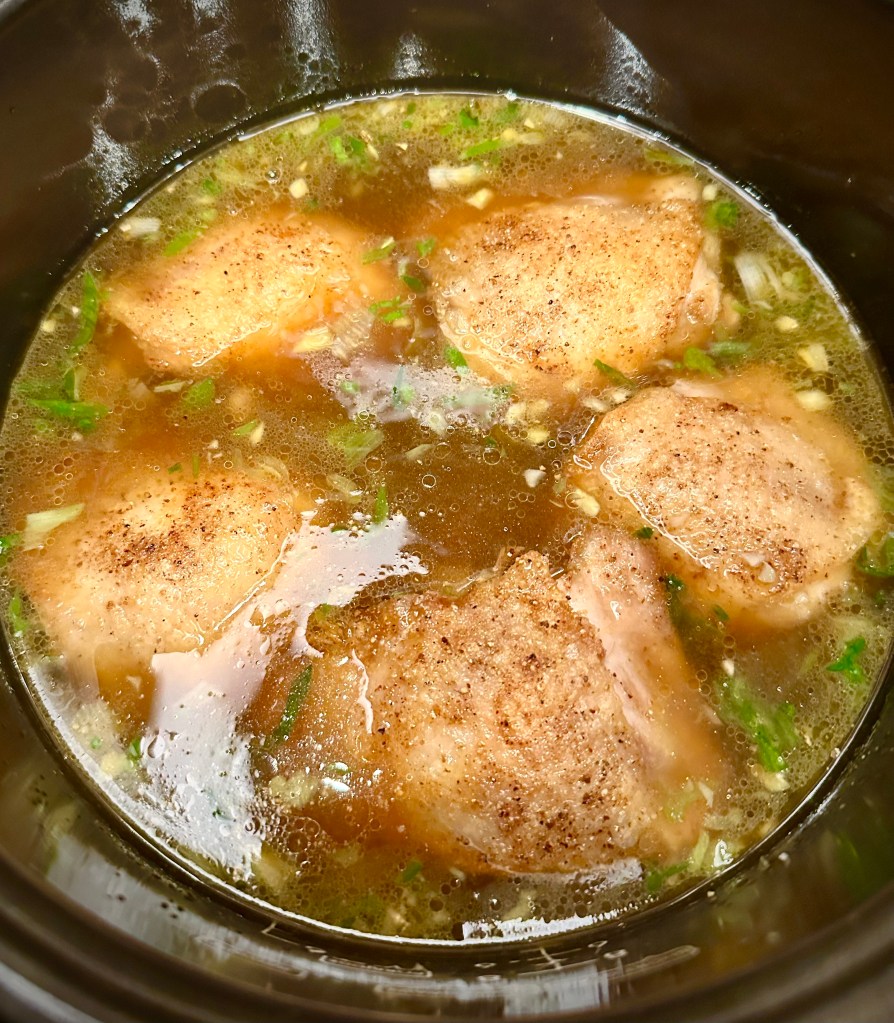
Then add the sausage, and cook for another 5 minutes. Now add the hot water and bring it to a boil and then turn it down to medium low for 30 minutes.

Add the chicken and bring it back to a gentle boil and cook for an additional 1-3 hours. When the fat comes to the surface skim it off, otherwise your gumbo will be greasy.

Here’s a simple trick. Use a paper towel folded in half and then again and gently lay it on the surface and let it absorb the excess oil. Use tongs to take it out. Do as often as needed.

When you’re ready to serve it, take it off the heat and add the file powder and green onions. Let it sit for a few minutes and rest, then spoon into bowls on top of your white rice.

Homemade Chicken Stock

Yes, stocks can be time consuming, but there are so many variations and the quality is vastly better than anything from the market. It is liquid gold indeed.

You will need a large heavy grade stock pot for this to work properly. If you don’t have one, then it’s a good time to invest.

Every time I chop vegetables like carrots, onions and celery, I always tend to cut a bit off, or peel them, but I save the scraps and freeze them for making stock. Yes, even the onion skins. Any left over chicken bones can also be frozen. The addition of the onion skins gives the stock a beautiful golden color.

A large stock pot filled with simmering chicken stock, including chunks of chicken, onion, garlic, celery, and black peppercorns.

In this recipe, I roasted a whole chicken and then after stripping away the meat, I used the carcass to make the stock. Literally, I got roasted chicken for dinner for one night, meat for chicken salad or sandwiches and now stock.

Ingredients: 

1 Whole Chicken, keep the neck, but remove the giblets if included. As mentioned, I like to roast the chicken to really bring out the flavor.

2 Carrots, roughly chopped

2 Celery stalks, leaves and all, roughly chopped

2 medium Onions cut in quarters. Skins on.

3-4 cloves of Garlic, left whole.

2 Bay Leaves

10 Black Peppercorns

A few springs of fresh Thyme

Preparation:

If you’re using a roasted chicken, when you’re ready to make your stock, strip off all the meat and set aside for other uses. pull apart the chicken carcass into pieces and put all ingredients into the stock pot, adding any of the frozen bits (vegetable scraps and random bones) you’ve stashed away.

Add enough water to cover the chicken. Bring to a low boil and then drop the heat and gently simmer covered with the lid slightly ajar for 8-14 hours. Throughout the process, it helps to skim off the scum that comes to the surface. The longer you can cook the better and richer your stock will be.

A close-up of a large stainless steel stock pot filled with homemade chicken stock, featuring pieces of meat, vegetables, and herbs floating in the liquid.

After allowing the stock to cool, strain it. I find two mesh strainers work well, or you can also use a strainer with some cheesecloth.

A close-up image of a clear chicken stock in a glass bowl, with a slight sheen on the surface, resting on a kitchen countertop.

Then cool thoroughly before either freezing or refrigerating in a covered storage container. I find that removing the excess fat that gathers on the surface really keeps the stock clear and gives a better mouthfeel.

How to make a Roux

 A roux is the fundamental base for many Continental classic sauces and is essential in Cajun and Creole cooking. It is a wonderful way to thicken a sauce and is easy to make. The one key to a roux is that the flour must be cooked long enough for the flour to lose its raw taste.

There are four basic types of roux:

White- Only for the most delicate sauces, primarily used in French or Italian cuisine.

Light Brown- For delicate dishes like soups (bisques), or as an addition to a sauce.

Medium – For most poultry and seafood dishes. It’s the color of light milk chocolate.

Dark – For smoky dark gumbos for wild game, turkey or really any meat if you like that smoky flavor. It’s the color of dark chocolate. 

Close-up of a freshly made white roux in a pot, stirred with a wooden spoon, with a smooth, creamy texture.

This is just when you start cooking the roux. This would be considered a white roux. If you look below, you will see a light roux and below that a medium roux and then the final dark roux.

A pot containing a light-colored roux with a wooden spoon stirring it, showing a smooth, bubbling mixture.
A thick, brown roux simmering in a pot with a wooden spoon resting inside, ready to be used for flavorful sauces.
A close-up view of a pot containing a smooth, dark brown roux, with a wooden spoon resting on the side.

Ingredients: 

1 cup of vegetable oil or butter, but not olive oil.

1 cup of flour, all purpose 

Note: If you don’t need this much roux, just use less ingredients, but keep the equal parts ratio.

Preparation:

In a heavy sauce pan or Dutch oven and turn the heat onto medium. Let it heat for a few minutes and then add the oil and allow it to heat for a few more minutes. This is my trick to allow the oil to heat first, as I find that this can allow you to make a perfect dark roux in as little as 30 to 45 minutes. If you are using butter, skip this step as the butter has a tendency to burn.

Now add the flour and stir with a figure eight motion for as long as you need, to reach the darkness of the roux you need. I like to use a wooden spoon to make my roux, and the only key at this point is don’t stop stirring or it will burn.

If the mixture is cooking too fast and starting to burn, turn down the heat. Roux will burn in an instant, and once burned is not salvageable.

Nonna’s Stuffed Shells with Marinara

This is the kind of comfort food that I really enjoy cooking. It is the kind of food your Nonna would make on Sunday, and it is both comforting and very tasty.

It takes a little prep time, but I find the end result really satisfying. It’s still amazing to me how such simple ingredients can transform into something so incredibly good.  And, they are wonderful the next day, if they last that long.

Ingredients:

1 12 oz box of Jumbo Pasta Shells
2 Egg Yolks
1 Egg
1 Package of Ricotta Cheese
1/2 cup Parmesan Cheese, grated.
2 cups Mozzarella Cheese, grated.
1/4 cup Parsley, chopped.
Freshly grated Nutmeg, just a bit, or a pinch.
1/8 tsp Oregano
3-4 cups Marinara, good quality store bought is fine, but feel free to make your own if you’re inspired.

Preparation:

Begin by boiling water in a large pot, once the water is boiling, salt it generously and add the shells. Give it a soft stir, but don’t disturb the shells too much. Timing is critical here, because if you over cook the shells, you will have a mushy mess.

Follow the package directions and cut the highest time by half and start tasting for doneness at that point. Example, the package of shells I used said 10-13 minutes. I started tasting at 7 minutes. Had I cooked them for even 10 minutes, they would have been too soft. I found 9 minutes was perfect.

When they are cooked very al dente, pour them into a colander and rinse them well with cold water. Separate them with your fingers and continue to rinse until they are cool. As they are rinsed, they will not stick together.

Beat together your two egg yolks and your egg and them fold in the ricotta, Parmesan and mozzarella. Add in salt, pepper, parsley and nutmeg. Put this mixture into a gallon freezer bag  and twirl the bag to make a piping bag, then cut a 1/2 inch corner off the end to fill the shells.

Put about 1 1/2 cups of you marinara on the bottom of your baking dish and then take each shell and pipe in the ricotta mixture. Squeeze the shells slightly and lay them next to each other in the dish.

When all the shells have been filled, or you are out of room, sprinkle on the oregano, add the rest of the marinara and add more Parmesan and or mozzarella cheese. Cover tightly with foil and into a 375F oven for 35-40 minutes. Cook until it is bubbling. Remove from the oven, uncover and let it rest for 5 minutes and serve.

Makes 4 hefty portions.

Spaghetti and Meatballs

While this is not traditionally a dish found in restaurants around Italy, I think it’s pretty much synonymous with Italian American cuisine. My approach is to keep it simple and treat it as two dishes combined. Meatballs in a marinara sauce. 

There are so many options for meatballs and so many things you can add. This is my basic recipe and feel free to experiment. 

Ingredients:

Meatballs:

1 lb Beef, ground, but not too lean. 80/20 is perfect. 

1 lb Pork, ground

2 Tbsp Breadcrumbs 

2 Tbsp Milk, whole. 

2 Eggs, beaten 

1 Tbsp Parmesan or Romano Cheese, grated

Salt and Pepper

1 Tbsp Onion, grated. 

1 clove Garlic, crushed. 

Dash of freshly grated Nutmeg. 

Gently combine the meat using two forks to pull it together without compacting it. The key to a good moist meatball is not to overwork the meat. Then combine the breadcrumbs and milk and add the two eggs and beat the mixture. 

Gently mix the garlic, onion, grated cheese and nutmeg into the meat mixture and add the breadcrumb, milk and egg mixture in a bit at a time gently incorporating it with a fork and then finish with salt and pepper. Cover it, and into the fridge for at least an hour.

Sauce:

Olive Oil

1 medium Onion, minced

1/2 cup Carrot, minced

1/2 cup Celery, minced

2 cloves Garlic, minced

1/4 cup Marsala or White Wine 

2- 28oz cans of whole peeled Tomatoes, crushed by hand. 

Salt and Pepper

Preparation:

Form your meatballs into the size of about a golf ball. Then you have two choices. You can lightly sear them in a sauté pan with olive oil or you can drop them into your simmering sauce. I believe either way is good.

Sauté your onion, carrot, celery, and garlic until it’s translucent, and the smell changes slightly. The key to a good sauce is a properly prepared sofritto.

Deglaze with your wine and add your tomatoes and bring to a gentle simmer. Add in your meatballs and simmer gently for 2-3 hours.

Serve with spaghetti and traditionally some garlic bread. Perfect!

Babaghanoush – Smoky and Delicious

This is a traditional “mezze” dish. Mezze are small dishes that can be served for either lunch or dinner and can also be starters for a larger meal. I personally like to have 3 or 4 different ones and serve them as a meal.

There are many versions popular throughout the Middle East, but fundamentally most are quite similar. I like this one because it is smoky and richly flavored.

Ingredients:

3-4 Medium Eggplants, or 2 large if the smaller ones aren’t available.

2 cloves crushed Garlic, soaked in your lemon juice. It removes the harshness.

5 Tbsp Tahini, or more to taste.

Juice of 2-3 Lemons, start with two and then add additional as needed.

2 Tbsp Extra Virgin Olive Oil

Sea Salt

Preparation:

Preheat the oven to 425 degrees. While the oven is heating, take the eggplants and prick them all over. This is essential so they will not explode when you cook them. Turn on a gas flame and brown the eggplant skin on all sides, turning them frequently. A pair of tongs makes this very easy. This will take about 5-8 minutes, but keep a close watch on them.

After they are well browned, put them onto an aluminum foil or parchment lined baking sheet and into the preheated oven for approx 45 minutes or until they are wrinkly and soft.

Take them out and allow them to cool. Then slice them in half and take a soup spoon and gently remove the flesh. Make sure to get all of the darkly colored flesh close the skin, as this is where you will get the smoky flavor. Make sure not to get any of the skin. Put the flesh into a colander and let the juice drain off. This juice can be bitter.

Put the flesh into the food processor and pulse and then add the remaining ingredients. Begin by adding the lemon juice, garlic and then the tahini a bit at a time. Finish with one tablespoon of the olive oil and the reminder of the olive oil can be poured over the top just prior to serving.

I prefer this after it has rested in the refrigerator for a few hours. Once it has cooled, taste again for salt and serve with warm pita bread.

Note: This dish is made by tasting, as some eggplants can be bitter and some less so. 

Chicken alla Cacciatore(Pollo alla Cacciatore)

This is a very old school Italian dish. It means a dish prepared in the “hunters style”. Historically it was made with rabbit or other game, really whatever was available, but I feel chicken is easier to find and just as good. 

It may seem like a lot of ingredients but it really comes together quickly. It’s a simple one pot meal. And, even better the next day. 

There are two schools of thought regarding the chicken. I use boneless skinless chicken thighs, but some prefer a bone-in thigh or an entire chicken cut up to add flavor. While I understand this, I find it very messy as the chicken falls off the bone and the bones end up in the final dish and I feel it’s hard to eat. If that’s not an issue for you, then go for it.

Ingredients: 

2 lbs Chicken Thighs, boneless skinless. 

1/2 cup of Pancetta

3-4 Tbsp Olive Oil

1 Onion, chopped 

1 Red Pepper, chopped 

1 Carrot, chopped 

1 stalk Celery, chopped 

5 cloves Garlic, minced

1/2 cup Marsala or white Wine

1/2 cup pitted Kalamata Olives. 

2 Tbsp Capers 

2 packages Mushrooms, sliced – optional. 

2- 28oz can Crushed Tomatoes or suitable fresh tomatoes. I like to use cherry tomatoes sliced in half.

1 sprig fresh Basil

1 tsp Oregano

1 Bay Leaf

1 tsp Thyme 

1 tsp Chili Flakes

Salt and Pepper

Parmesan Cheese

Preparation:

Salt and pepper both sides of the chicken thighs and into the fridge. Take it out a bit before cooking to take the chill off. Cook the pancetta until lightly brown and gently brown the chicken on both sides. 

Finely mince your onion, red pepper, carrot, celery and garlic and then sauté in the same saucepan. Add olive oil as needed. Deglaze with your Marsala wine.

Add your tomatoes and the rest of the ingredients, and simmer gently for 1-2 hours. It just gets better. 

Spoon into bowls and grate Parmesan cheese on top. It’s very good on it’s own like a stew, with some crusty bread, but feel free to serve with pasta or extra vegetables if you choose. If you choose pasta, use a tube or shaped pasta, like penne or rigatoni.

Chicken Fricasse, Poulet a’ l’Ancienne

Another French classic which has many variations. This is the kind of food French grandmere’s have perfected over generations. It’s a bit of a cross between a sauté and a stew, but the real key is the braising sauce.

It utilizes that workhorse of the French kitchen, the mirepoix. A mix of onions, carrots and celery. Gently sautéed in butter and a bit of oil, it’s magical.

I’d suggest that the classic recipe for fricassee is from Julia Child. I’ve made her version and it is very good, but very involved. This modified version from Martha Stewart is excellent and vastly easier to prepare. I’ve changed it a bit, but essentially the same.

Both recipes call for a whole chicken cut up, but I find the consistency of the boneless skinless thighs work very well, feel free to use either.

Ingredients:

2 1/2 lbs Chicken Thighs, boneless skinless. Trimmed of excess fat.

4 Tbsp Butter

1 Tbsp Olive Oil

1 Carrot, minced

1 Onion, minced

1 Celery stalk, minced

2 cups Mushrooms, quartered

2 Tbsp Flour

1/2 cup White wine

2 cups Vegetable or Chicken Broth

1/2 Tbsp Thyme

1- Bay Leaf

2 Egg Yolks

1/2 cup Heavy Cream

1/2 Lemon, juiced

Preparation:

Preheat your oven to 350F. Heat your butter and oil in your oven proof Dutch oven and begin by lightly browning the chicken on both sides. Brown only a few pieces at a time, or they will steam rather than brown. Remove and set aside.

Add your mirepoix(onion,carrot and celery) into the pan and gently sauté as you scrape away any browned bits. These are packed with flavor.

Add your mushrooms and sauté until they give up their water. Add your flour and stir until the mixture starts to thicken. You are basically making a roux, to thicken the fricassee.

Add in your wine and cook until it reduces and begins to thicken. Add your broth and simmer gently. Then, add your thyme and bay leaf.

Put the chicken into the Dutch oven and gently stir to coat the chicken and into the oven uncovered for 40 minutes.

Just before the chicken is done, whisk together your egg yolks and heavy cream.

Remove the chicken from the oven and carefully add a few tablespoons of the sauce to the egg yolk/cream mixture, one at a time to temper it and then fold the mixture into the chicken to finish the sauce. Give it about one minute to thicken. Finish with lemon juice.

Hainanese Style Chicken Rice

Hainanese Chicken Rice is a traditional dish originally from Hainan Island, in which the chicken is gently poached and then served with rice and a dipping sauce. The dish was originally derived from a dish called Wenchang Chicken and was taken by Chinese immigrants to Singapore and Malaysia. Once there, it evolved into the dish we know today. 

This is not a traditional preparation, but I wanted a dish that had the wonderful flavors, but was faster to prepare and could be done in one pot. Using the rice cooker is perfect. If you don’t have a rice cooker, any sturdy pot with a lid will work. 

Ingredients: 

4 -5 Chicken Thighs, bone in

2 Tbsp Oil

4 -5 Scallions, chopped

4 cloves Garlic, minced

3 inch piece of Ginger, minced

1 1/2 cups brown Jasmine rice, see note. 

3 cups Chicken or Vegetable Broth

1 Tbsp Soy Sauce

1 Tbsp Fish Sauce 

1 Tbsp Sesame Oil 

Salt and black or white pepper 

Dipping Sauce:

Finely chopped scallions, soy sauce, ginger, rice vinegar and sesame oil. This is optional, but it really does add a lot of flavor.

Preparation:

Begin by salt and peppering your chicken on both sides and letting it rest in the refrigerator. I like to toast the white peppercorns lightly, before I grind them. 

Chop finely or use a mini prep for your scallion, garlic and ginger and set aside. Wash and drain your rice and then prepare your dipping sauce if using.

In a medium size skillet heat up your oil and sear your chicken thighs on both sides and set aside. You want them just slightly browned. If you want the skin to be more poached and velvety, then feel free to skip this step. 

Add in your scallion, garlic and ginger to the same pan and sauté gently. Do not allow them to brown, then add in your rice and sauté for about a minute until it’s well coated. 

Add this rice mixture to your rice cooker, add in your broth, soy sauce , fish sauce and sesame oil and mix it up. And then gently lay your chicken skin side up on top and put your rice cooker for normal cooking time for the type of rice you’ve chosen.

After the rice cooker has finished, allow it to set covered for 10 minutes. 

Note: I’ve suggested a 2 to 1 ratio of broth to rice, because I used brown jasmine rice and that is the ratio my rice cooker calls for. If you choose to use white jasmine rice, a ratio on one to one should be fine or just follow the directions for your rice cooker.

Georgian Chicken – Shkmeruli

Georgian food was a cuisine that I just hadn’t had a chance to explore. After hearing a lot about it and having a few Georgian bakeries and restuarants opening up nearby, I decided to do a deep drive and I was impressed. It’s rich cuisine with influences from many cultures.

This is a one pot meal that’s packed with flavor and is even better the next day. While not a totally traditional classic Shkmeruli, it’s very good and quite a bit lighter as I did not add the cream. Although I must say I’m sure it would have been even better with it.

Ingredients: 

Chicken, I used 5 bone in thighs.

Flour, for dusting. 

3 Tbsp Butter

1 1/2 Tbsp Khmeli Suneli spice blend, 1/2 for chicken, 1/2 for flour. See note.

6-8 cloves Garlic, minced

3 medium Carrots, chopped 

1/2 cup Celery, chopped.

1 Onion, chopped

5-6 Baby Potatoes, cut into 1/2 inch pieces 

1/2 cup White Wine 

1/4- 1/2 cup Chicken or vegetable broth

Salt and pepper

1/2 cup Heavy Cream, optional 

Preparation:

Season your chicken with spice blend and salt and pepper. Allow to rest in the fridge. 

Preheat your oven to 350F. Coat the chicken in the flour and spice blend and brown in your oven proof pan and set aside. 

Add the garlic, vegetables and potatoes into the Dutch oven and wilt slightly. Deglaze with your wine. Add back your chicken, remaining spice mix and veggie stock. 

Cover and into a 350F oven for 35-45 minutes. Remove cover and add cream if using and cook for another 10 minutes. Remove from oven and adjust for salt as needed. 

It is traditionally served with Georgian bread to soak up the sauce. You can sub warm pita if the traditional bread is not available.

If you need to make this gluten free, you can skip the flour coating and just brown the chicken directly in the pan.

Note: You can find many Khmeli Suneli spice blends online, but I particularly like this one from Mariko. Very balanced and incredible flavor. You can order it on Amazon from their storefront. They are a small business and they ship directly.