Biscuit Topped Apple Cobbler

This is a great way to use up any leftover apples or other fruit and handy if you’ve got some canned biscuits laying around as well.
Ingredients:
4 large Granny Smith Apples, peeled and cored. Cut into 1 inch pieces.
4 Tbsp Butter
1 tsp Cinnamon
1/2 tsp Nutmeg
1/2 cup Sugar
2 tsp Vanilla Extract
Pinch of Salt
1 can of Flaky Biscuits
Topping:
1 Tbsp Butter
3 Tbsp Sugar
Preparation:
After peeling, coring and cutting the apples into 1 inch pieces, put them into a sauce pan with the 4 melted tablespoons of butter. Add a pinch of salt and allow them to soften and reduce.
Then add sugar, cinnamon, vanilla and nutmeg. Continue cooking until slightly thickened. If you find they are not sufficiently thickened, add a cornstarch slurry and continue cooking. You make a slurry by adding 1 tsp of cornstarch with 2 tsp of water and mixing together. Once at desired thickness, pour into a pie dish/pan to cool. A square Pyrex can work as well
Preheat your oven to 350F. Open your can of biscuits and cut each biscuit into quarters and arrange on top. Sprinkle with remaining sugar and dot with butter. Bake for 18-20 minutes or until biscuit topping is nicely browned.

Pasta alla’Amatrice

This was a speciality of Florence’s in Boston’s North End. Sadly Florence passed away and the original restaurant closed in 2015. I like the idea of keeping the dish alive. I’ve heard they’ve reopened as the Florentine Cafe.


After I moved away from Boston, I tried to recreate Florence’s recipe, and I think this is very close to the original. This sauce can be made thicker and more concentrated by just using one can of tomatoes. It’s your choice.
 
For the purists, they would likely disagree that this is the famous pasta from the town of Amatrice. However I like both. If you want to sample the “real” dish from Amatrice, here is a link. https://www.ciaoitalia.com/seasons/season-2300/episode-2316/pasta-allamatrice

Ingredients:

 
1 large finely chopped Onion
5 cloves of Garlic, finely chopped
½ lb. Pancetta (Italian Slab Bacon), either cut into ¼ inch cubes or ¼ inch strips 
2- 28 oz. cans of crushed Tomatoes, or whole tomatoes that are lightly chopped in the processor. San Marzano’s are the best.
3 tsp. Red Pepper flakes or a few whole red chili peppers – Optional
2 Tbsp. Butter
Few grindings of fresh Nutmeg
Salt and freshly ground Black Pepper
Grated Romano and/or Parmesan Cheese
Pasta of choice. Bucatini is traditional, but I use penne.
 
Preparation:
 
Melt the butter over medium heat, and add the pancetta. After the pancetta starts to release it’s aroma and renders down, add the onion, garlic, and cook until translucent. 
 
Now add the nutmeg, red pepper flakes and the salt and pepper. You want to just let the mixture sauté gently until it smells fantastic, usually about 5 to 10 minutes over medium heat. 
 
Then add the tomatoes, bring it back to a simmer, and let it slowly cook. After 1 to 2 hours, you will have an amazing rich sauce, which is perfect with any tube pasta. Florence always served it with penne, so I do the same. 
 
Before you add the sauce, always sprinkle your grated cheese over the drained pasta, toss and then add the sauce and toss again, and then add more Parmesan cheese. Tossing is the key to a well-made pasta dish.

Risotto alla Parmigiano Reggiano, the perfect rice dish?

Risotto is one of the most amazing dishes known to man. It is a simple combination of butter, stock and rice, which when properly prepared rises to an art form.
Many people do not know this, but in Italy rice is raised in the north in two main areas, the Piemonte (think Milan and Turin) and the Veneto, which is the area of Venice.

The north of Italy has always been more of a rice centric region while the south was more of a pasta centric region. While not complicated to make, for an authentic risotto, the ingredients and cooking process must be followed carefully. I have seen many variations on this theme, but a basic recipe is a good place to start.
There are a few things you must remember to make a good risotto:
Only use true Italian Carnaroli or Vialone Nano rice, other rice just doesn’t give equal results. If you’re in a pinch, medium grain rice will give you vastly superior results to long grain rice, but it’s not quite the same. These rices can be purchased in most grocery stores, but can also be ordered online.
Use weak stock, as the constant cycle of reducing will concentrate the flavor. I prefer stock at about one quarter strength. You don’t want to use a stock with garlic in it, as you will be reducing this stock down and thus any predominant flavor will definitely over power the final dish.
Always have bit more stock than you think you’ll need simmering beside you. If you run out of broth, just substitute some warm water.
Make sure that the stock is handy to the cooking area, and simmering before you start. If your right handed, keep the simmering stock to your right, and if your left handed vice versa.
Note:  Once you begin the risotto, keep stirring. Now is not a good time to be distracted, as it will burn or scorch very quickly.
 
This is the mother recipe for most risottos, and is the basic one that allows you to create the many variations.

Ingredients: 

4 to 6 cups of weak Vegetable or meat based stock
3 Tbsp. Butter
2 Tbsp. Vegetable Oil, don’t use extra virgin olive oil as the flavor is too strong
2 cups Arborio Rice
4 Tbsp. finely chopped white Onion.
½ cup Parmesan Reggiano
Preparation:
First begin by melting 2 Tbsp. of the butter and all of the oil in a heavy saucepan. Then sauté the onion until it becomes clear. Do not let it brown.
Using medium heat, add the rice and stirring constantly, sauté it for 1 min. until it is completely coated with the oil and butter mixture.
Using a ladle, start adding in the simmering stock, ½ to ¾ cup at a time. Stir constantly until the stock is absorbed and then add more.
Continue the cycle until the rice is soft but still “al dente” Normally about 20 minutes, maybe more depending on the rice and temperature.
Now, turn off the heat, add the rest of the butter, the Parmesan cheese and then salt and pepper to taste. Mix thoroughly.
Serve in individual shallow bowls and serve immediately.  Risotto should not sit around until the other food is ready. Serve it as soon as it is finished. You may add additional cheese at the table.
Note: It makes a perfect secondi (pasta/rice) course prior to a main dish.

Tofu with Black Bean

I really enjoy making this dish because it’s easy to prepare, vegetarian/vegan and packed with flavor. Perfect when you want something lighter.

 
The time required to make this dish is really just in the initial prepping of the ingredients. Once you start, the cooking time is barely 5 minutes.
 
It uses a unique ingredient which is the Lao Gan Ma Chili Oil With Black Bean. This legendary sauce is just one of many made by Lao Gan Ma. She is probably most known for the Spicy Chili Crisp, which has a cult following amongst professional and home chefs.


The story of the lady who founded it is well worth a read. Needless to say, she is now a very wealthy woman. Some people jokingly call it the “smiling lady sauce” due to her serious expression in the jar.
 
 
Ingredients:
 
2 Tbsp Oil
14 Oz extra firm Tofu cut in small, 1/2-inch cubes
1 Tbsp Lao Gan Ma Chili Oil With Black Bean
1 tablespoon Shaoxing rice wine or dry Sherry
3 Garlic cloves, minced
Ginger Root, 2 inch piece minced
6-8  dried Chilis. Tien Tsin, Facing Heaven or Er Jing Tao.
1 Red Pepper, cut into 1/2 inch pieces
3 green onion, cut in pieces
 
Sauce:
2 heaping tablespoons Lao Gan Ma Chili Oil With Black Bean
2 tablespoons Chinese light Soy Sauce
1/4 cup Vegetable Broth
1 teaspoon Chinese dark Soy Sauce
1 teaspoon Sugar
Pinch of Brown Sugar
1/2 tsp Corn Starch
 
 
Preparation:
 
Prep all of your ingredients before starting to cook.
 
 
Add the Shaoxing wine and 1 Tbsp of LGM black bean paste to the cubed tofu to marinade. I’ve left it for up to an hour in the refrigerator and it imparts a nice flavor.


Heat your wok to smoking hot and add your oil. Stir fry the dried chili until they blister, add the red peppers and green onions. Finally, add the garlic, and ginger.


Once almost done, add tofu and then sauce mixture gently toss and allow to thicken.


Serve with rice. I prefer brown Jasmine rice.
 
Note: All of these ingredients are easily available in your local Asian market. If you are new to cooking Chinese food, I’ve posted a comprehensive pantry list. With this stocked pantry, you can cook most any Chinese dish. Once you buy these items they will last for a long time, and will allow you make a variety of dishes.
 
Additionally, if you want to make this without using the LGM black bean paste, this can easily be made with fermented black beans known as dow see.

Thai “Beef” with Basil (Pad Gra Prow)

This is a very traditional Thai street food. Great for breakfast, lunch or a snack. The Thai name above is a bit generic, as it doesn\’t mention beef as pad refers to stir frying and gra prow or kaphrao refers to basil. I was craving this dish, as I used to  eat it frequently in Thailand. It’s commonly made with minced pork, beef or chicken.

It’s a bit of Thai/Chinese fusion dish, which is quite popular in Thailand, due to strong Chinese community. I like to make a big batch of fried rice and then eat the leftovers for breakfast with a fried egg on top.

I wanted to create a non meat version so I used the Boca Crumbles from the frozen food section. If you have another favorite non meat product, feel free to use it, but I do think the minced texture works well. If you want to use meat, then pork, beef or chicken work as well.

Should you want a completely vegetarian version, just omit the fish sauce and add a bit of lime juice and some extra soy sauce or Golden Mountain sauce.

Ingredients:

2 Tbsp Vegetable Oil
4 cloves Garlic, sliced
2 inch piece fresh Ginger Root, peeled and chopped.
1/2 Onion, sliced
1/2 Red Pepper, sliced
1 bag Boca Crumbles
Splash of Vegetable Stock
1 Tbsp Chili Paste
1 Tbsp Rice Wine
1 Tbsp low sodium Soy Sauce
1 Tbsp Fish Sauce, or sub Golden Mountain sauce to be completely vegetarian.
2 cups of fresh Basil, torn.
Lime Juice
I Egg, fried

Preparation:
Start the oil in your wok. Add the garlic, ginger, onion and red pepper. Stir fry until slightly crispy around the edges.Add your Boca crumbles and a splash of vegetable stock and stir fry until it thaws and begins to break up.

Keep stirring and then add your chili paste and rice wine. When reduced, add your soy sauce, fish sauce and basil. Once the basil has wilted, remove from the heat and spoon over brown jasmine rice and finish with a bit of lime juice.

Quickly fry your egg and add it to the top.

Note: If you want to really get that authentic Thai flavor, find yourself some holy basil or purple Thai basil and go for it. I cheat and use my own basil from the garden, as I have so much.

Mojo- Cuban Citrus Marinade

This marinade was a revelation to me. I got the recipe from a friend in Puerto Rico, but she said it was originally from Cuba. I decided to make a batch to marinade some meat for the grill and it was incredible.

Here are a few hints:

  • Try to use the freshest ingredients and grind the black pepper and cumin as needed. Cumin has a nasty habit of turning bitter when it has been ground for a long time.
  • Put your meat into a large plastic bag that seals and then lay it into an oven proof dish to avoid spills. Trust me on this one. Cleaning up leaked mojo is no fun.
  • Turn over the plastic bag occasionally, so the marinade stays evenly distributed.
  • If you want to use this to marinade seafood or fish, reduce your marinading time to one or two hours max. Otherwise you will end up with mushy cerviche.

Ingredients:

Juice from 4 lemons
Juice from 4 limes
Juice from one Orange
4 Tbsp Olive Oil
5 cloves of garlic mashed
1 Tbsp freshly ground Cumin Seed
1Tbsp fresh ground Black Pepper
2 tsp Sea Salt
4 Tbsp fresh Cilantro

Preparation:

Blend all together in food processor and pour over chicken, beef or pork. Marinade in the refrigerator for 4-6 hours minimum or up to 24 hours. Longer is better.

Remove form the bag and shake off the excess marinade and lay onto a hot grill and grill, turning occasionally until done. Serve with fried plantains, rice and black beans.

Many thanks to Wag for the image.

Ponzu Sauce- Japanese Liquid Gold

Since its finally grilling season, I wanted to share this wonderful marinade. This is perfect as a dipping sauce and/or basting sauce for most any meat, seafood, gyoza/dumpling or vegetable. However, I think it really shines on anything grilled.

Traditionally from Japan, it is made with the yazu fruit, which has a distinctive citrus flavor. As yazu are not easy to find here and the the prepackaged juice can be quite expensive, I wanted to find a recipe to recreate that flavor.

You can certainly buy ready made ponzu sauce, but they are packed with salt and sugar. I vastly prefer the cleaner taste of homemade.

This a relatively small batch, but feel free to double or triple it. It stores well in the refrigerator for up to two or three weeks.

Ingredients:
4 Tbsp low sodium Soy Sauce
2 Tbsp Mirin
Juice of one Lemon
2 Tbsp Orange Juice
Juice of 1/2 Lime
1/2 cup Dashi, dried bonito flakes
2 inch grated Fresh Ginger Root
1 tsp Sugar, optional

Preparation:

Mix all ingredients into a lidded container and shake vigorously. Allow to rest overnight or up to 24 hours and then strain before using as a marinade or dipping sauce.

Brush on prior to grilling and during grilling. Brush a bit on before serving or use as a dipping sauce.

Note: If you want to add toasted sesame oil, then 1 tsp is perfect. Additionally, the dashi flakes can be found at most Asian markets or can be ordered online.

Pan Fried Dover Sole aka Sole Meunière

It’s said that this classic French dish is what created Julia Child’s life long passion for French cuisine.

It is very good and it’s flawless in its simplicity and attention to detail. It uses copious amounts of clarified butter and is finished with brown butter. Add some lemon juice, salt, pepper and fresh parsley and there you have it. As always, I suggest you prepare the classic dish and taste it before you start to change it around. So, ditch the capers I added if you want it pure.

I wanted to try and create a slightly healthier version utilizing a plant based butter and EVOO. I really didn’t know if it would work, but I have to say I was very happy with the results.

As I had some really lovely capers on hand, I added those, which made this more of a fish piccata, but cooking is about experimenting.

Since there are so few ingredients, it’s very important to use the freshest you can find. If you can’t find Dover sole, which can be tough  then a good substitute is Pacific Dover sole. It’s not actually sole, not from Dover, obviously, but a flounder.

Ingredients:

1 lb Sole filets
Flour for dusting the filets
Salt and Black or White Pepper
6 Tbsp Butter or sub Mykonos vegan butter. Keep 2 Tbsp aside to finish the sauce.
2 Tbsp EVOO
Juice of one Lemon
3 Tbsp Capers, optional
Freshly chopped Parsley

Preparation:

Preheat you over to its lowest setting. As you are going to cook the filets in batches, the oven will keep them warm.
Begin by seasoning your flour with salt and pepper. Then season your filets, knocking off any excess flour.

Heat your sauté pan over medium/ high heat add in 1/2 of the butter (2 Tbsp) and 1/2 of EVOO and wait until the butter is sizzling and gently place in half of the filets, without crowding them.

Sauté until golden brown and flip over. Usually it’s about 2-3 minutes per side depending on thickness. Remove from the pan with your fish spatula and on a warm plate and into the oven.

Then same procedure with the rest of the filets. And into the oven.

Add your retained 2 Tbsp of butter to the sauté pan, add your capers, chopped parsley and lemon juice and reduce for maybe 1 minute. Pour this sauce over your warm filets and serve immediately.

Note: if you would like a more traditional dish, then omit the capers and just add your retained 2 tablespoons of butter and lemon juice to the pan and reduce. Then pour the sauce over the filets and sprinkle the fresh parsley on the top.

Cannellini Beans alla Marcella Hazan

I’m a bit obsessed with the beans now for two reason. Firstly, the beans I ordered from Rancho Gordo in Napa are so good, and secondly, the weather has taken a turn and become very cold, so these sorts of foods just beg to be made.
The creamy texture of these beans is wonderful. It’s a simple recipe, but takes some planning. However, the results are well worth the time.
This is not Marcella’s exact recipe as she calls for sage and frankly, I’m not a big fan. However, if you are a fan, feel free to substitute sage for the thyme.
I’m a big believer in soaking the dried beans for at least 4-6 hours or overnight. I like to use a heavy cast iron pan like Le Creuset to do the soaking, so I can go right to the stove top without any bother.
And, I do add salt to the soaking water and I don’t discard the soaking water. I know this is heresy for some people, but I’ve had good results. I think the article below is well worth a read.
It’s really only the soaking that requires the planning. After that, it’s just low and slow and a little hack that I’ve developed that works very well to finish the beans.
Ingredients:
1 lb dried Cannellini Beans, soaked for 4-6 hours so there is about 2 inches of water above the beans and with 1 Tbsp of sea salt mixed in.
3 Tbsp Olive Oil
1/2 Onion, coarsely chopped.
1 Carrot, coarsely chopped.
1 stalk Celery, coarsely chopped.
3 cloves Garlic, peeled and mashed
Fresh Thyme, just tie in a bundle with some butchers twine.
Freshly ground Black Pepper
Preparation:
Bring the beans to a boil and skim away the scum that rises, then reduce heat and add in all ingredients, gently stirring them in.
Cook it for at least 1 – 1 1/2 hours on a very gentle simmer, gently stirring occasionally.
Preheat your oven to 350F, cover the pan and into the oven for an additional hour.
Remove from the oven, remove the thyme bunch and serve with an extra drizzle of olive oil. I enjoy eating the vegetables, but feel free to remove them if you want pure beans.
Note: If you have trouble finding dried cannellini beans, you can substitute great northern or navy beans.

Marlow and Son’s Butterbeans, Garlic Confit and Preserved Tomatoes

I first saw this recipe in Bon Appetit and was fascinated. It used interesting ingredients combined in a unique way and I had to try it. The recipe was given in response to an email from BA writer to Marlow chef Patch Troffer, but the recipe had no measurements and timing.
After making it, I adjusted a few things and added quantities and timing and was very happy with the results. I ordered my dried beans from Rancho Gordo in Napa and they were excellent.
To make it spectacular, you really do need to make the garlic confit and preserved tomatoes. They aren’t hard to make, but set aside a bit of time. Make a full recipe and then use the rest for other dishes.
Garlic Confit:
3 heads of Garlic, peeled and left whole.
3/4-1 cup Olive Oil
4 springs fresh Thyme
2 Bay Leaves
2 dried Chili Peppers
Add all ingredients to a small saucepan and cook on barest simmer for 1-2 hours. (This broad cooking time is due to the fact that some garlic has more moisture than others). You’ll want the cloves to be submerged in the oil while cooking and be a light golden brown when done. Remove from heat, cool completely and add to a lidded glass container and store in the refrigerator. FYI, this pic shows a smaller batch. Clearly I did not follow my own advice to make a full recipe and I ended it up having to make more.
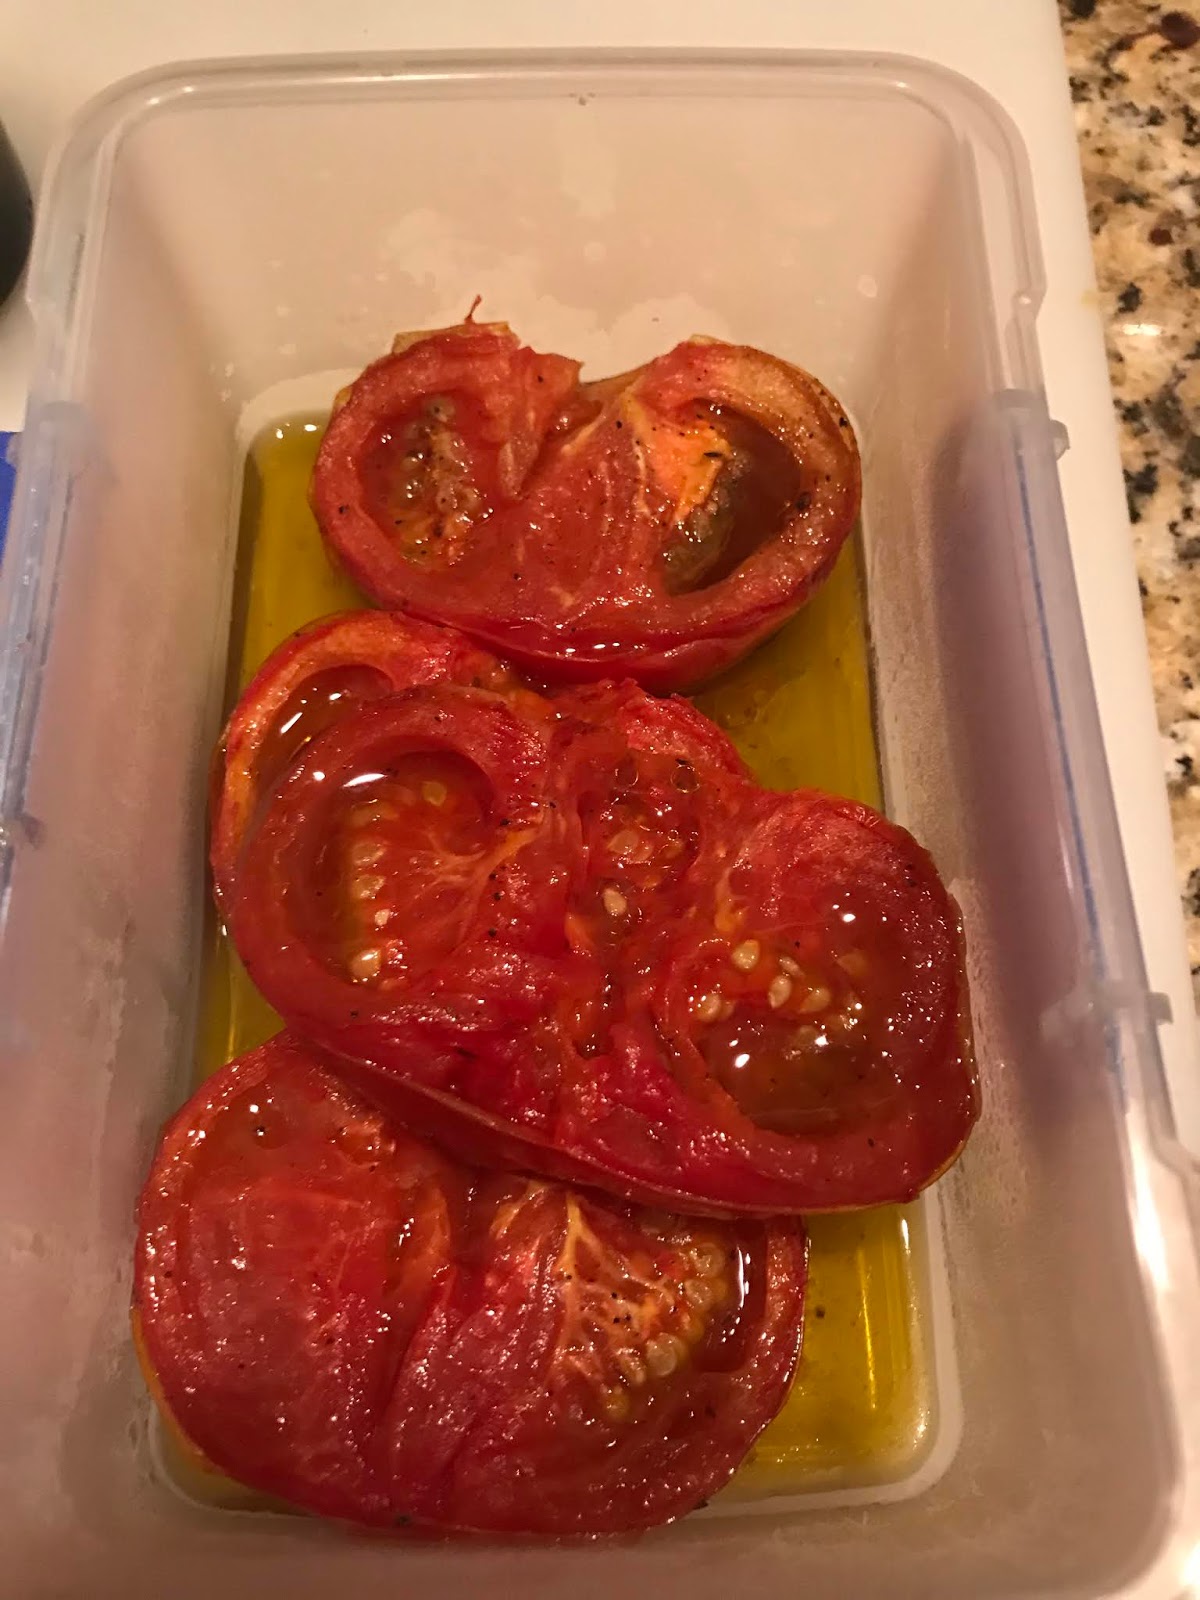
Preserved Tomatoes:
3 medium Tomatoes, halved and cored.
1/4 cup Olive Oil
4 sprigs fresh Thyme
4 Bay Leaves
Sea Salt and Black Pepper
1/2 tsp Sugar
Prepped:

After:

Take 1/2 of the olive oil and pour into the baking dish. Add the thyme sprigs and a bit of the salt, pepper and sugar. Lay the tomatoes sliced side down and drizzle rest of olive oil over them. Wedge the bay leaves in between and finish with rest of salt, pepper and sugar.
Into a preheated 250F oven for 2 hours. Turn over the tomatoes at the half way mark and continue cooking. Allow to cool and transfer to a container and store in refrigerator.
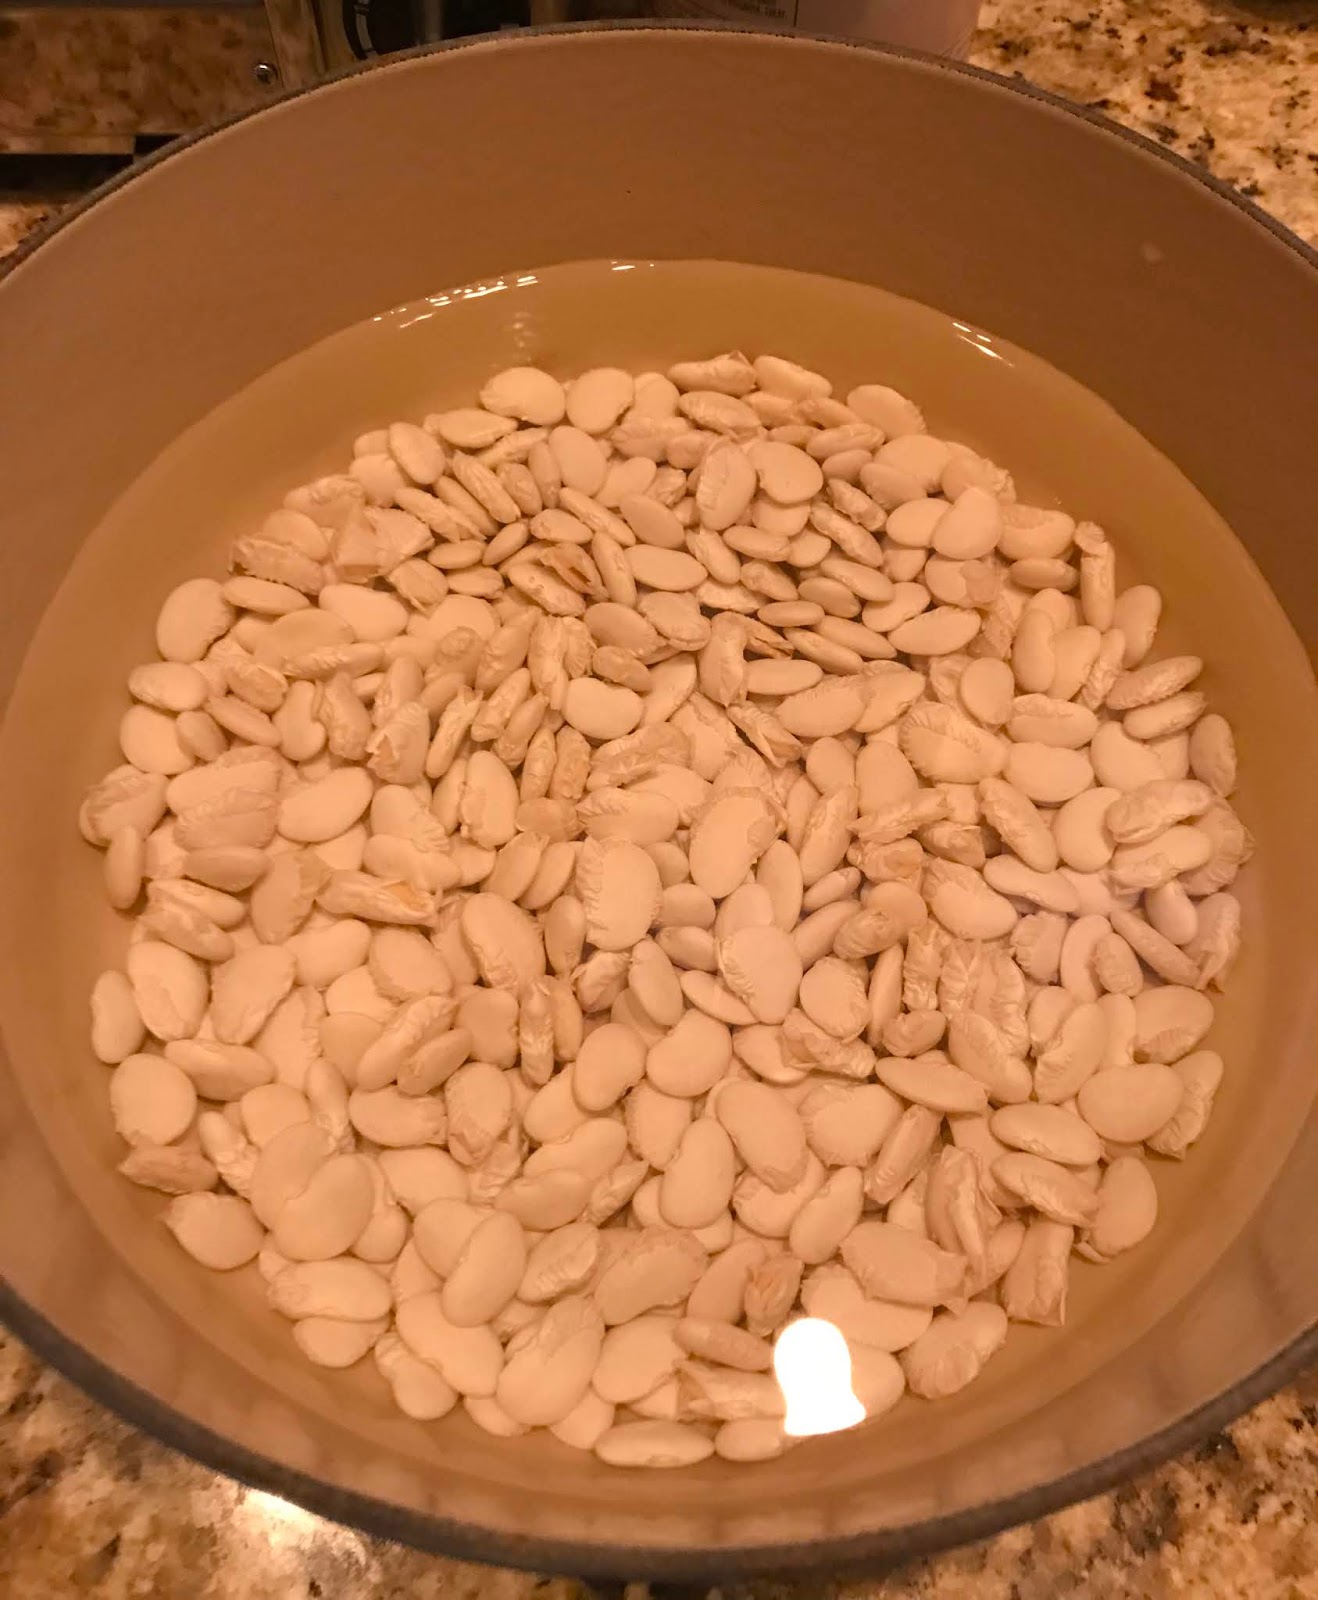
Ingredients:
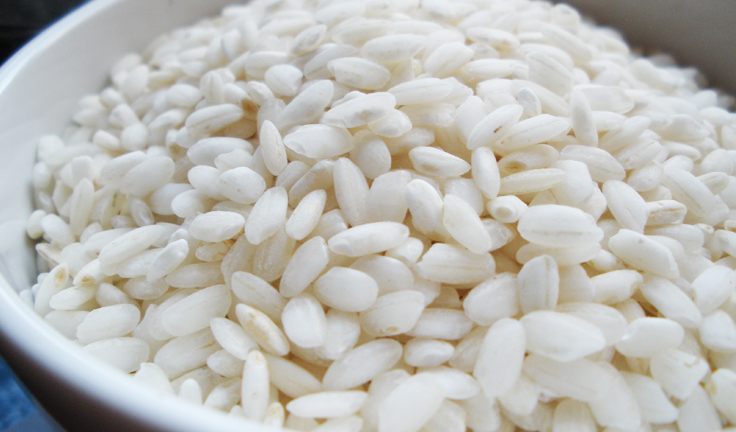
1 lb Dried White Lima Beans, soaked overnight.
1/2-3/4 cup of Garlic Confit
2 halves of preserved Tomatoes, loosely chopped.
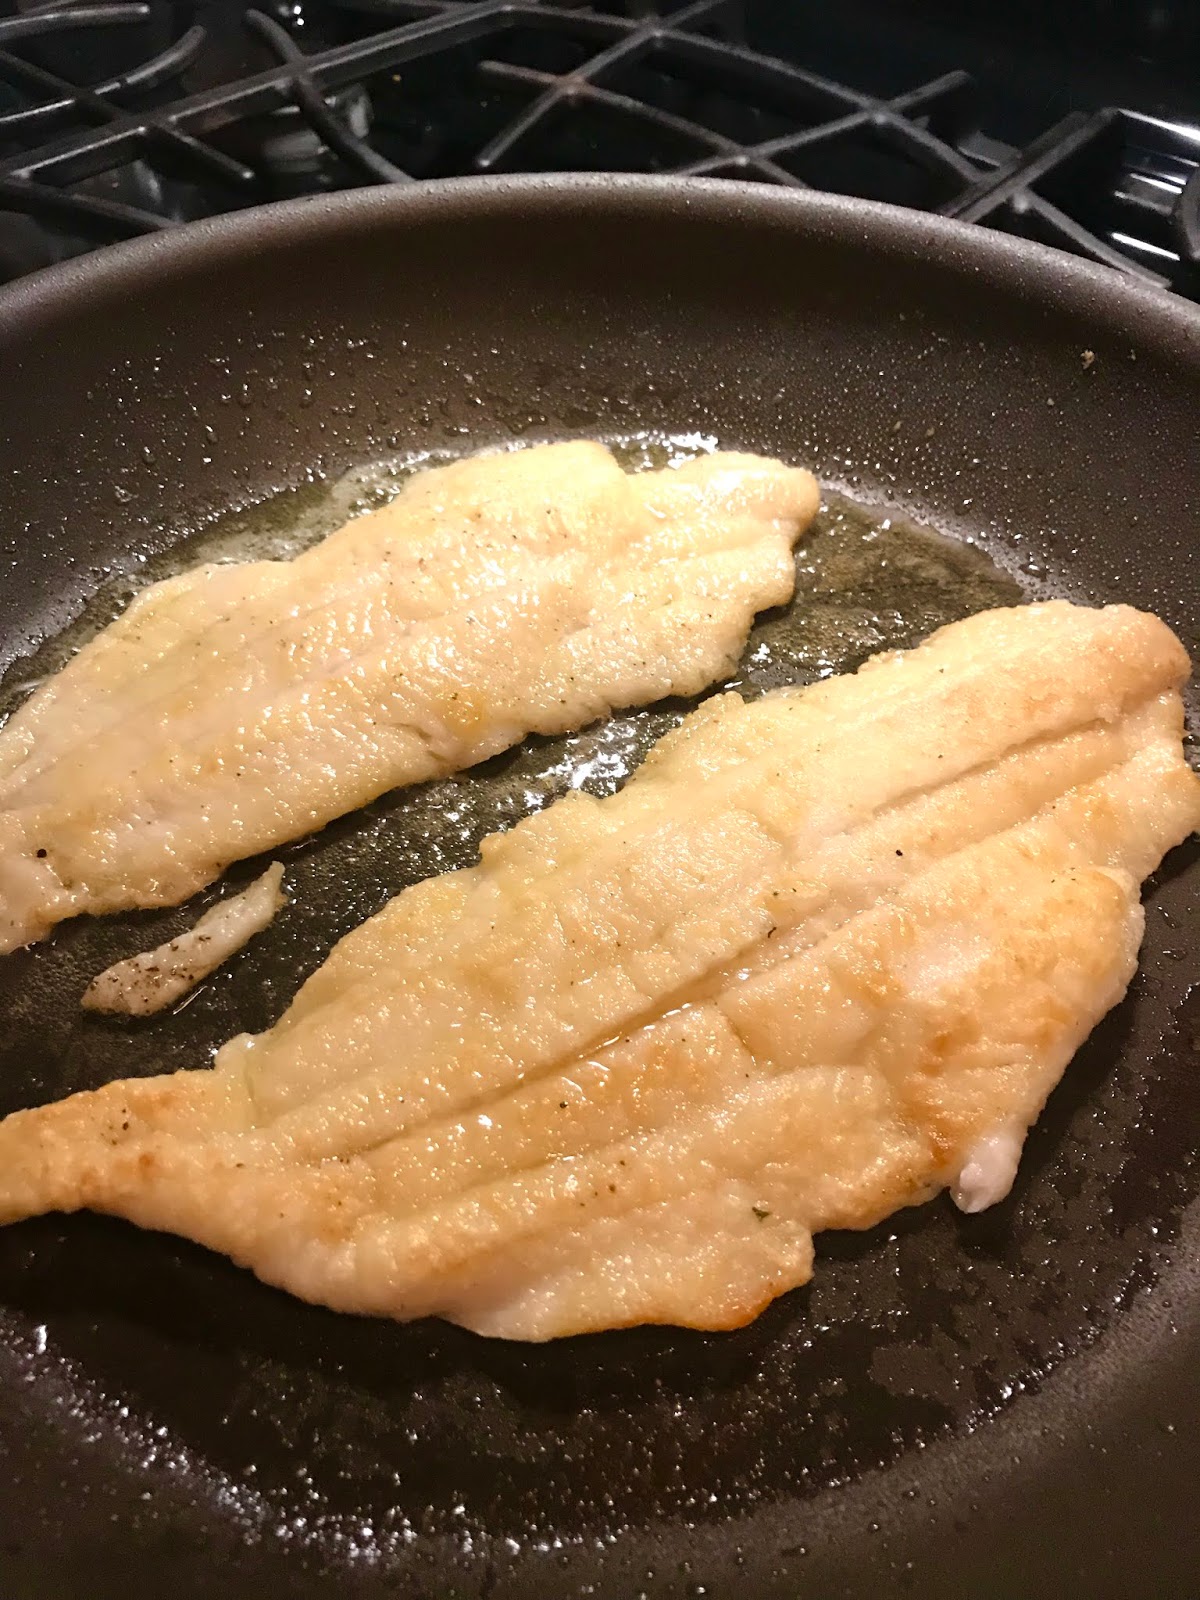
1 Lemon, sliced in half and cooked flesh side down in a dry sautepan until browned.
1 tsp dried Oregano, if using fresh, increase the amount.
1 tsp dried Thyme,  if using fresh, increase the amount.
2 1/2 tsp Salt
3 Tbsp Sherry Vinegar
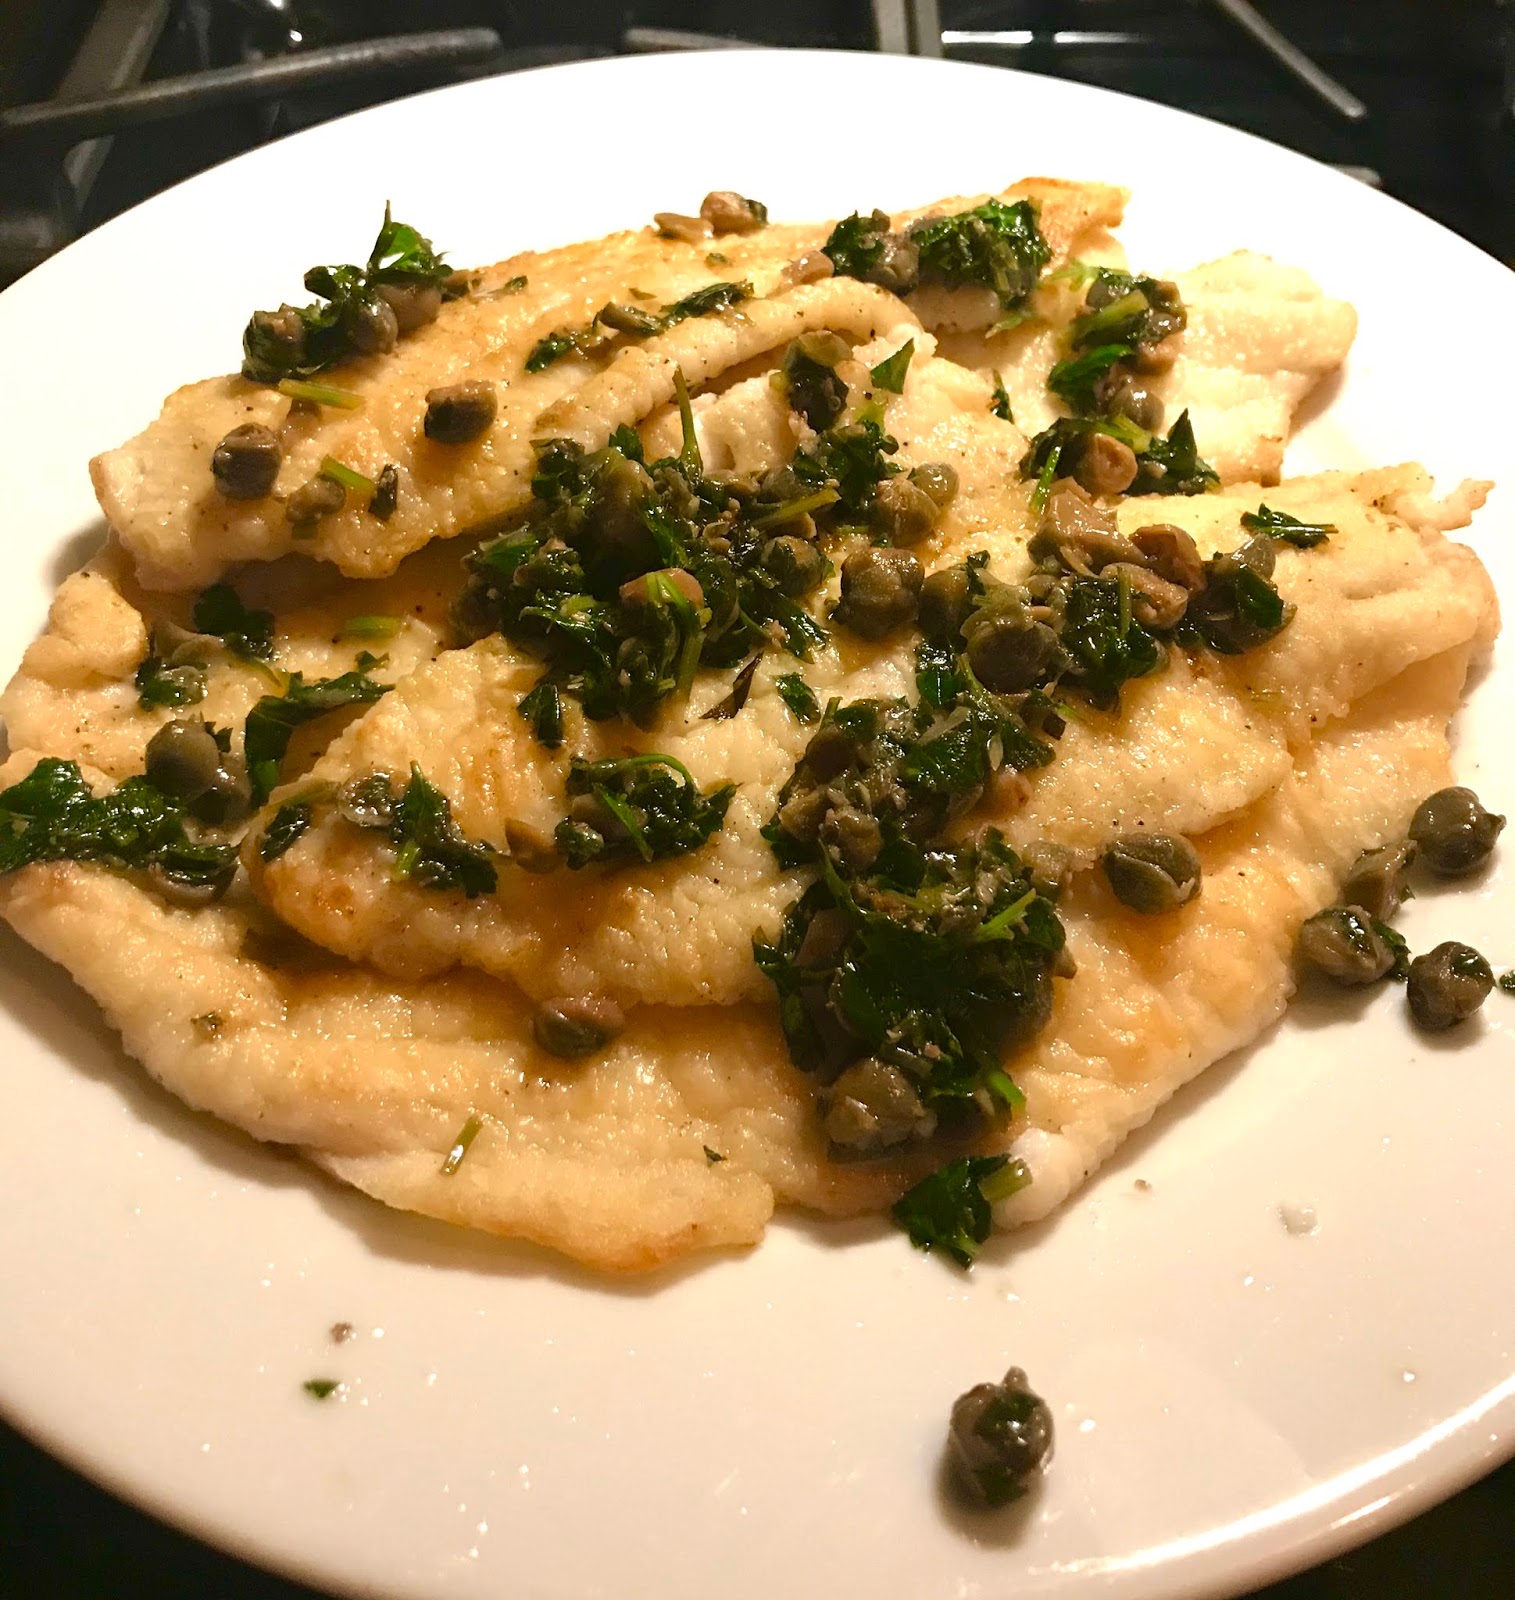
Toasted Bread Crumbs, coarse and seasoned.
Dollop of Aioli – Marlow and Son’s recipe called for it, but I didn’t have it handy. I’m sure it would make it even better.
Preparation:
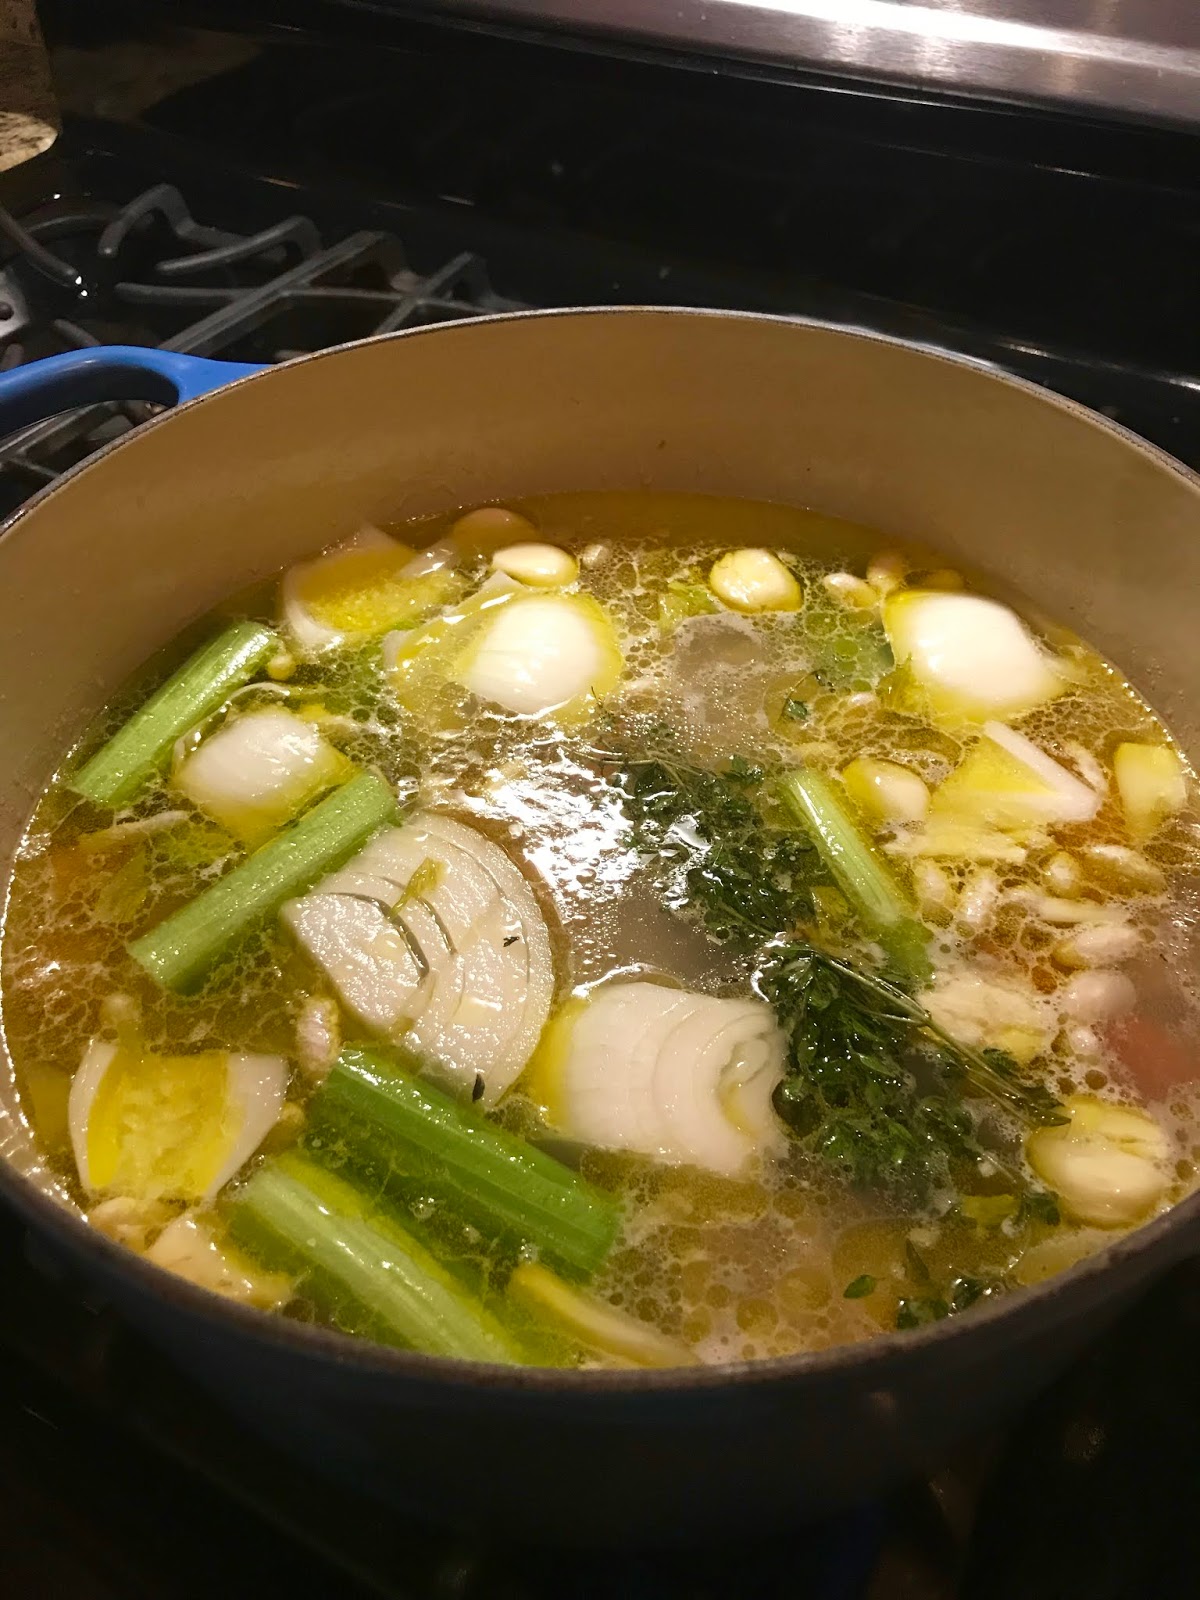
After your beans have finished soaking, bring them up to a boil and skim the scum. Add some salt, stir and skim one more time. It’s important to add the salt as the cooking process progresses. Don’t just dump it all in at once. Layering the seasoning is the best approach.
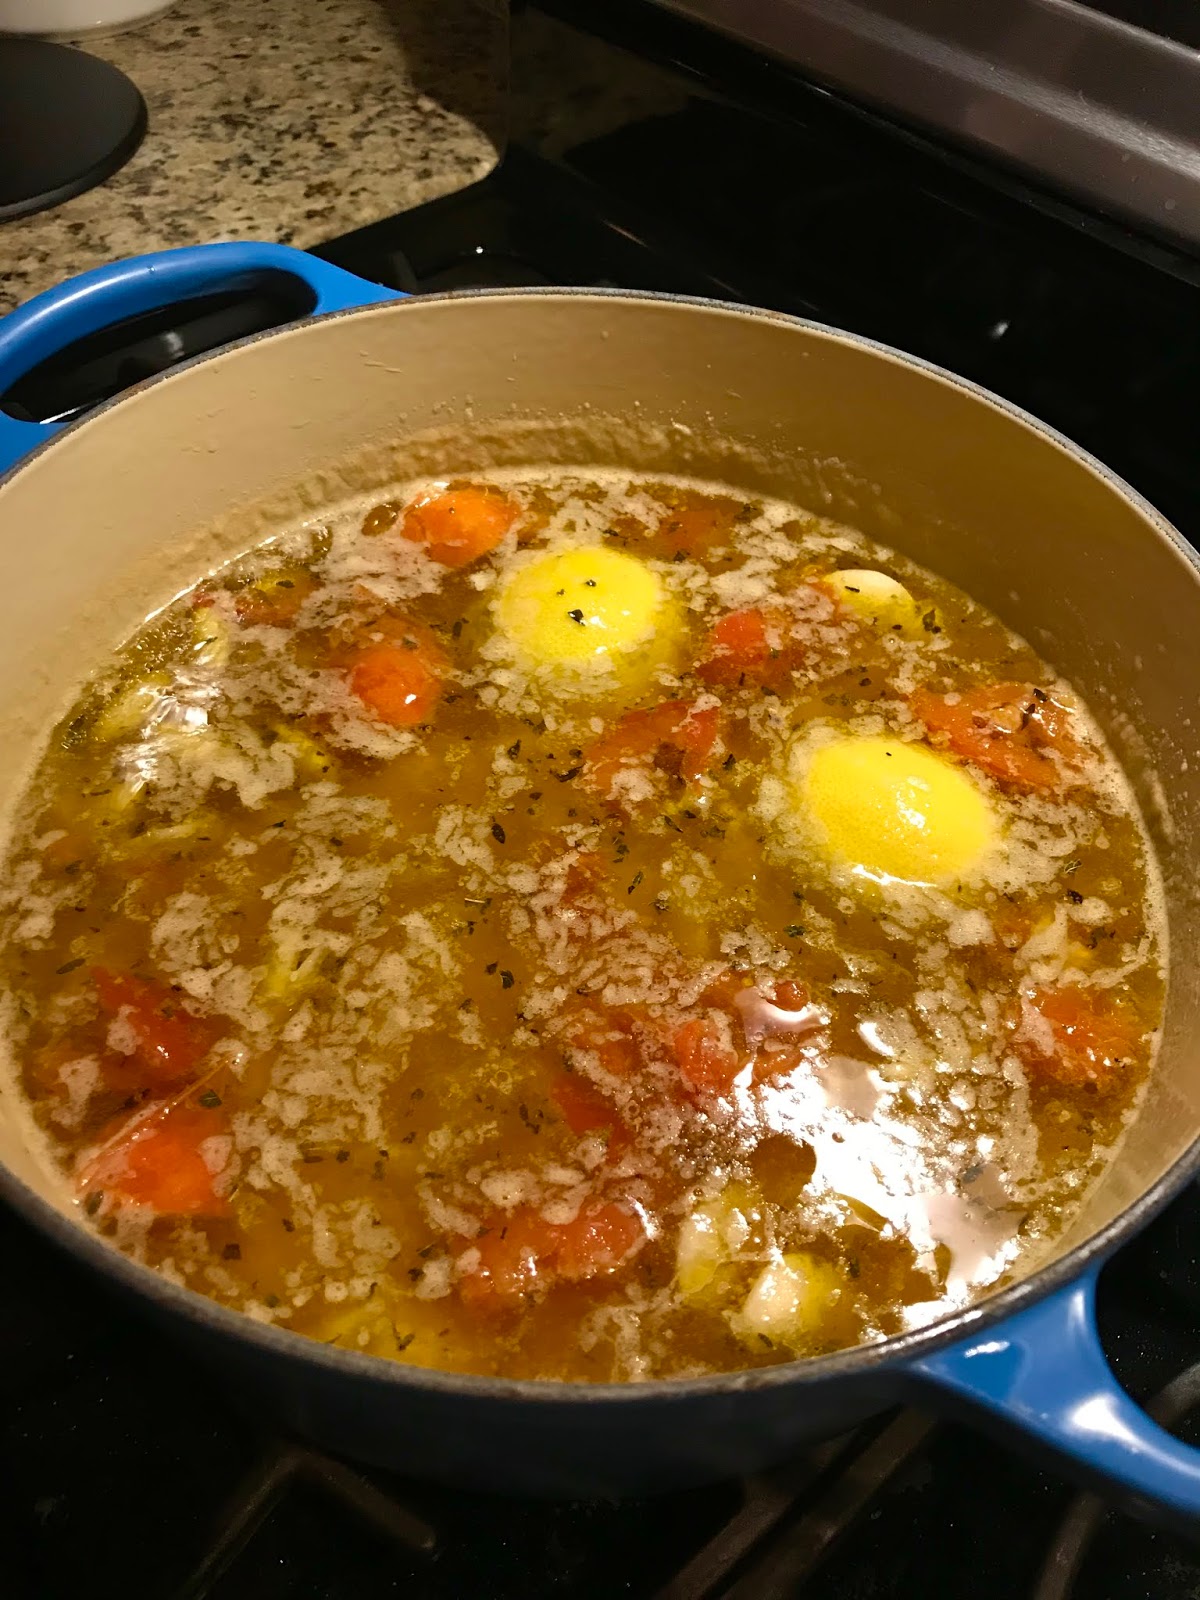
Reduce to gentle simmer and add the garlic confit, so you have at least an inch of oil covering the beans. Stir in gently and add some salt, some thyme and some oregano. Cook for 1 hour on the barest simmer.
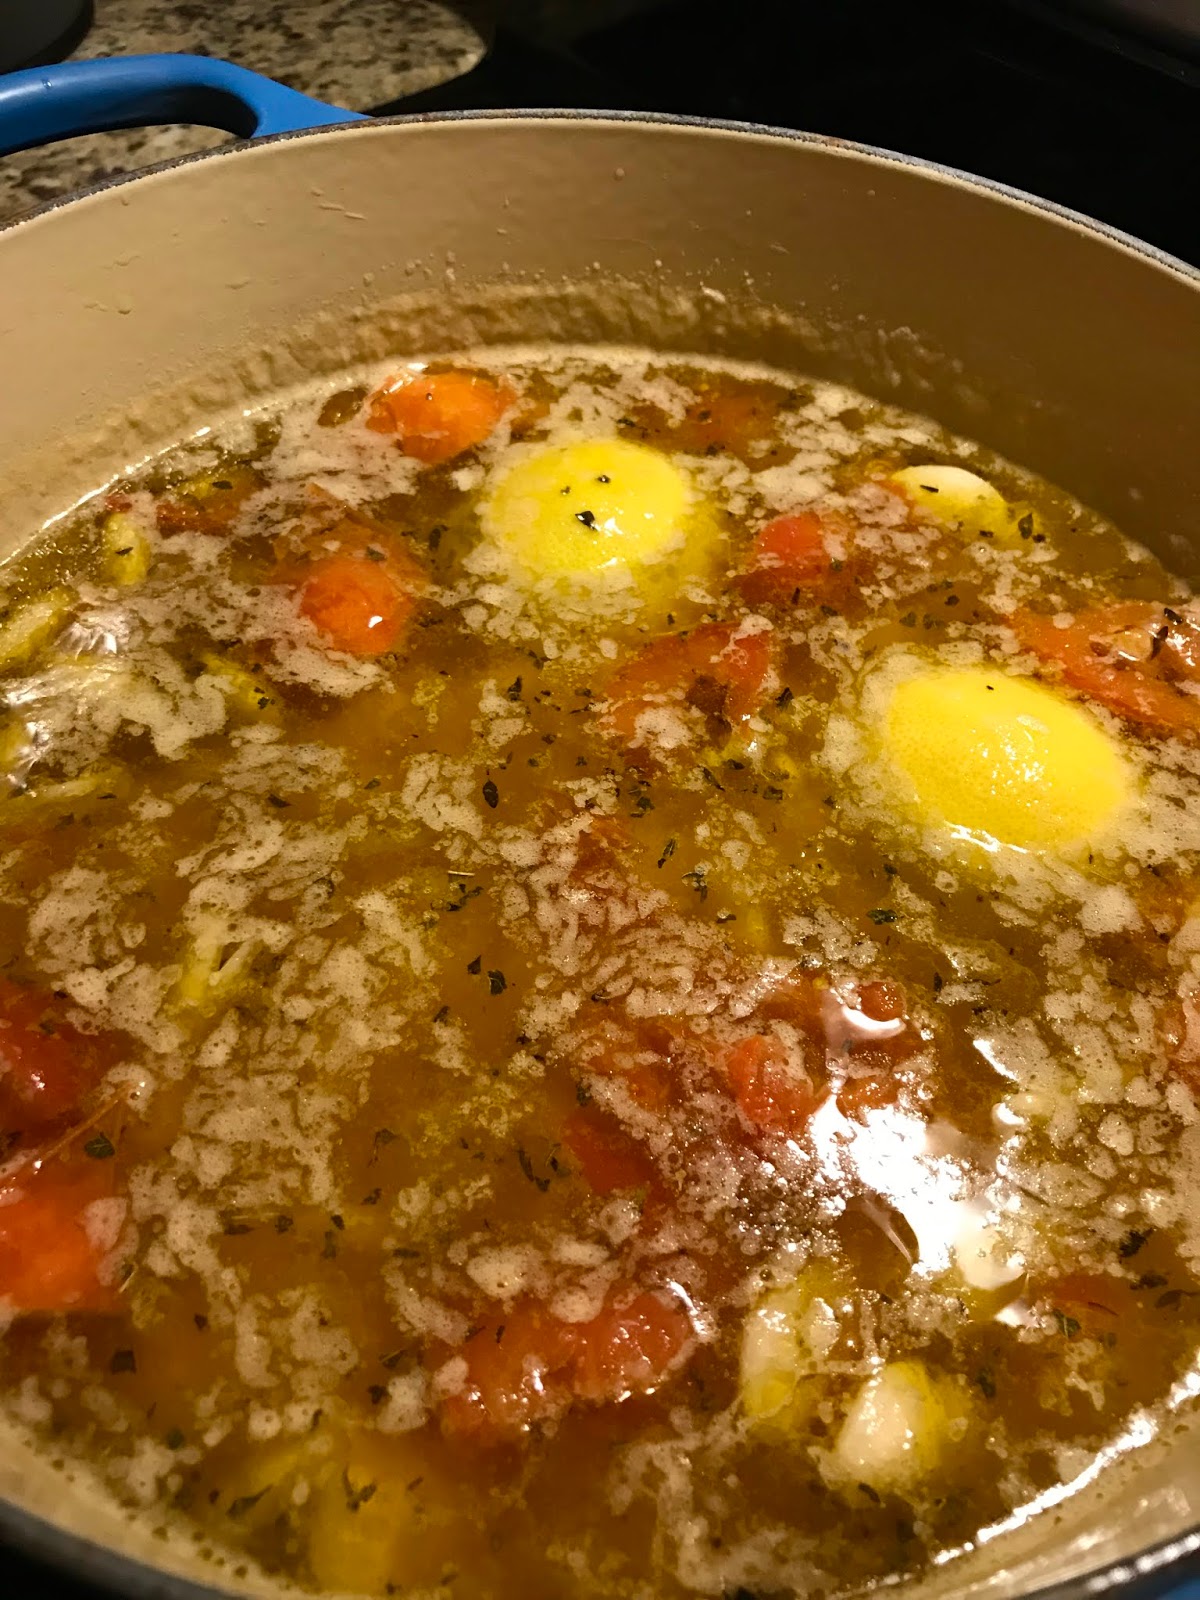
Then add in the preserved tomatoes and browned lemon halves and some additional salt. Add the rest of the thyme and oregano. Cook for 2 hours.
Taste for salt and seasoning and adjust as needed. Splash in your sherry vinegar and cook for additional 10- 15 minutes. Spoon into large bowls and top with toasted bread crumbs.
Note: This total cooking time of 3 1/2 hours should be good, but if you feel it needs a bit more time, then go for it. You want the beans to be soft on the inside. My only other advice is to stir frequently and gently.